Making needlepunched pincushions is a good experiment in fibers and colors with a finished project at the end. I know that you know how much my friends liked these as little gifts.
 |
| Needle Punched Pincushions |
 |
| Carpet Protector |
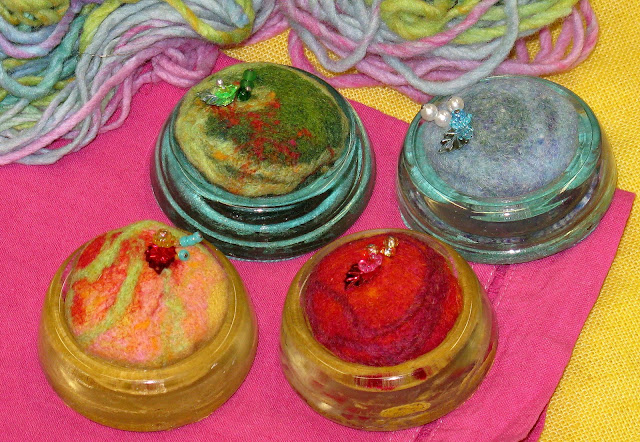
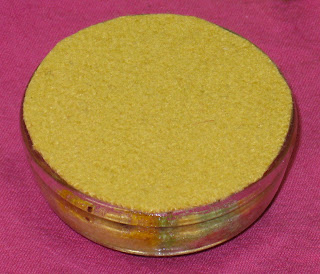
I started with some glass carpet protectors....the things we used to put under table legs to save our carpets from furniture marks. I bought a bunch of them at a flea market and brought them home with no idea as to what they would become. I knew that these glass pieces would become something new...upcycled!
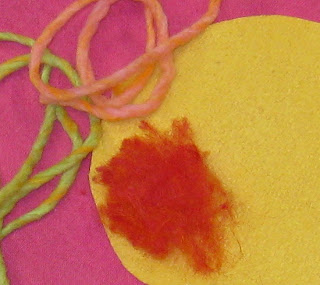
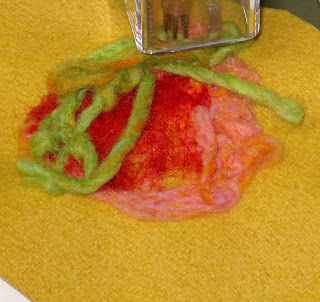
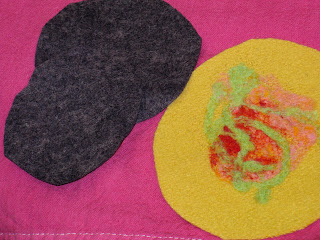
I wanted to play with fibers and colors using my needle felting machine. So, out came my mixed fibers and felt. I used the golden yellow felt as a base and added red wool roving and this cotton yarn called Colourscape (which is a Rowan yarn designed by Kaffe Fassett).
 |
| Wool Roving and Cotton Yarn |
I began by needling the red roving into the yellow felt, leaving some yellow showing through. Then, I scrunched the orange/pink yarn on one side. The light green yarn on top keeps its yarn shape.
 |
| Needle Punch Layers |
 |
| Needle Punched Design |
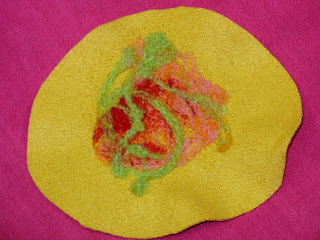
Here is the finished design. I measured the design space ahead of time so that no needle punched area would be lost in the sides of the pincushion.
 |
| Wool Felt Pieces |
I cut several sizes of wool felt that fit into the glass piece. I wrapped the design around the wool pieces and then glued them into the glass piece. I used a glue recommended for glass and fabric...E-6000. There are so many good glues to use, I always want to use a glue which is recommended for the materials I'm using.
 |
| Glue Felt to Base |
|
|
|
|
The next thing is to cut and glue a piece of felt to the base of the glass piece.
Adding pins with beads and sequins added a little pretty detail to the pincushion.
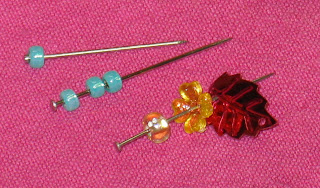 |
| Add Beads to Pins for Embellishment |
 |
| Pretty Pincushion |
|
I decided to use the same process to make a pincushion out of an old shoe brush. The brush was inside of a cool shoeshine box I bought at a flea market. I pulled the old bristles out and cleaned it up to create a different form for the pincushion. The bottom is the wooden handle of the brush. I wrapped and glued artisan handmade yarn around the edges of the felt piece.


